How To Make R63 In Catalog Avatar Creator: The Ultimate 2025 Guide
Have you ever scrolled through Roblox and wondered, "How do they make those incredibly detailed, custom R63 avatars that look like they jumped out of a high-end game?" The secret lies not in complex 3D modeling software, but in mastering a powerful, often overlooked tool right inside Roblox: the Catalog Avatar Creator. This guide will dismantle the mystery and provide a complete, step-by-step walkthrough on how to make R63 in catalog avatar creator, transforming you from a beginner into a confident avatar artisan.
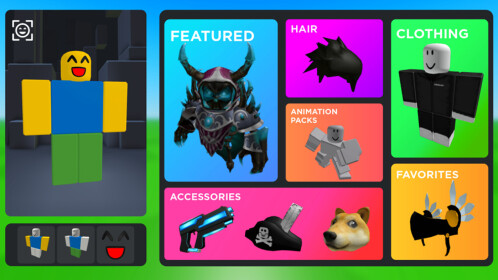
The world of Roblox avatar creation has evolved dramatically. While the basic Avatar Shop is great for mixing and matching pre-made items, true personalization—especially for the advanced R63 body type—requires deeper access. This is where the Catalog Avatar Creator comes into play. It’s a hidden command-line interface that unlocks a treasure trove of hidden body parts, animations, and customization options that the standard menu keeps under wraps. Whether you're aiming for a realistic human, a fantastical creature, or a stylized anime character, understanding this tool is your key to standing out in the R63 community.
This comprehensive guide will cover everything from the foundational question of "What is R63?" to executing advanced commands, troubleshooting common issues, and applying pro avatar customization tutorial techniques. We’ll move beyond simple tips and dive into the practical, actionable knowledge you need to create your own avatar that is uniquely yours, all without writing a single line of code. Get ready to unlock the full potential of Roblox's avatar system.
Understanding the Foundation: What is R63 and Catalog Avatar Creator?
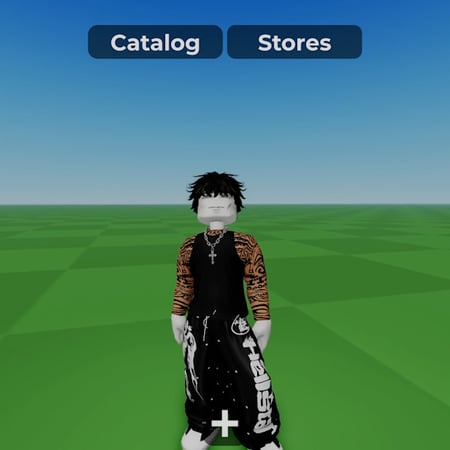
Before we start typing commands, we must establish a clear understanding of our core components. R63 stands for Roblox 63, a reference to the version of the Roblox engine and the associated Blender tools used to create the more advanced, anatomically detailed avatar mesh. It represents a significant leap from the classic R6 blocky avatar, offering a smoother, more proportionate, and flexible humanoid model. This body type is the standard for high-fidelity experiences and is required for many modern UGC (User-Generated Content) items and animations.
The Catalog Avatar Creator is essentially a developer console for your avatar. It’s a text-based command system that allows you to directly manipulate your character’s appearance by overriding the standard catalog selections. Think of it as having a backstage pass to the avatar engine. While the basic creation process in Roblox is simple—click an item in the Avatar Shop—certain features, particularly specific R63 bodyparts, remain undisclosed until you know the exact commands to summon them. This system is what enables creators to craft unique outfits and characters that aren't possible through the front-end menu.
The synergy between R63 and the Catalog Avatar Creator is where magic happens. The R63 body provides the advanced canvas—a detailed skeleton and mesh with more joints and better deformation. The Catalog Avatar Creator provides the paintbrush and palette, giving you direct access to every texture, mesh variant, and accessory slot, including those not publicly listed. Mastering this duo is the single most effective way to elevate your avatar game in 2025.
Decoding the Command Line: Essential Catalog Avatar Creator Commands
This is the heart of our R63 tutorial. The command syntax might look cryptic at first, but it follows a logical structure. The general format is often :CommandName [Parameter]. We will focus on the most powerful and frequently used commands that unlock the "gatekept" information.
Core Appearance Commands
These commands directly change your avatar's base appearance.
:SetBodyPart [BodyPart] [AssetID]- The fundamental command. It replaces a specific body part (e.g.,Torso,LeftArm,Head) with a custom mesh from the Roblox catalog using its Asset ID.:SetBodyColor [BodyPart] [Color3]- Changes the color of a specific body part. You can use color names ("Bright red") or RGB values ("255, 0, 0").:SetClothing [ClothingSlot] [AssetID]- Equips a shirt, pants, or t-shirt into its correct layer. Crucial for layering outfits properly.:SetAccessory [AccessorySlot] [AssetID] [AttachmentPoint]- Equips an accessory (hat, hair, face, etc.) to a specific attachment point on the head or body. This is key for complex accessory stacking.
Animation and Pose Commands
This is where you bring your avatar to life beyond the default idle.
:PlayAnimation [AnimationID]- Plays any animation by its ID. This includes custom emotes, dances, and idle animations not in your Animations menu.:StopAnimation- Stops the currently playing animation.:SetAnimationPriority [Priority]- Controls how animations blend. Useful for overriding default walk/run animations with custom ones.
Utility and Debug Commands
These help you manage and inspect your avatar.
:Clear- Removes all custom assets applied via the command line, reverting to your last saved avatar configuration. A vital "undo" tool.:GetCharacterAppearance- Prints your avatar's current asset IDs to the output window. Essential for saving or sharing your creation.:Reset- Resets your character to the default Roblox spawn state.
Pro Tip: Always have a backup of your favorite avatar's asset IDs (using :GetCharacterAppearance) before experimenting. You can always :Clear and re-apply them.
Step-by-Step: Creating Your Custom R63 Avatar Without Coding
Now, let’s translate these commands into a practical workflow. The promise of "learn how to create a custom r63 avatar on roblox in 2025 without any coding" is absolutely true. You are not writing code; you are using a precise command interface.
Step 1: Preparation and Asset Hunting
First, ensure your Roblox account is set to use the R63 body type. Go to Avatar > Body > Body Type and select "R63." Next, you need Asset IDs. Browse the Roblox Catalog or Toolbox in Studio for items. For any shirt, pants, hair, or body part you want, click the item's "...", select "Copy Asset ID." For advanced users, sites like roblox.com/library or community databases list IDs for specific sussy new r63 bodyparts.
Step 2: Opening the Catalog Avatar Creator
This interface isn't in the main menu. You access it via a special URL or a game that has it enabled. The most common method is to visit a dedicated experience like "Catalog Avatar Creator" (often found by searching the term). Once in that game, you'll see a text box at the bottom of your screen. This is your command terminal.
Step 3: Building the Base - Body Parts
Start with the skeleton. Use :SetBodyPart to replace standard limbs with custom meshes. For example::SetBodyPart Head 123456789 (replaces head with asset ID 123456789):SetBodyPart LeftArm 987654321
For a truly custom look, you might replace the Torso and LowerTorso with items that create a different silhouette, like a robotic core or a bulky suit.
Step 4: Layering Clothing and Accessories
This is where avatar outfit ideas come to life.
- Apply shirts and pants with
:SetClothing. Order matters! Typically: Shirt -> Pants -> Jacket (if applicable). - Add accessories. A complex roblox ugc avatar outfit might use multiple hair attachments. Use
:SetAccessorywith the correct slot (e.g.,Hair,Hat,Face) and sometimes a specific attachment point (likeHatAttachmentvsHairAttachment).
Example::SetAccessory Hat 1122334455 HatAttachment
Step 5: Finalizing with Color and Animation
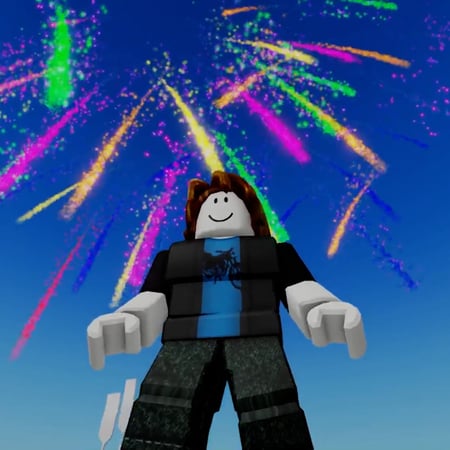
Use :SetBodyColor to tint any exposed skin or mechanical parts. Finally, use :PlayAnimation to test your avatar in motion. A great walk or idle animation can make even a simple outfit look dynamic. Find animation IDs in the Animation Editor or community resources.
Step 6: Saving Your Masterpiece
Once satisfied, use :GetCharacterAppearance to copy the long string of asset IDs. You can save this text in a note-taking app. To reapply this exact look later, some creators use browser plugins or scripts to batch-enter the commands, or you can manually re-enter the key :Set commands.
Advanced Techniques and Pro Tips for Stunning Avatars
Moving from good to stunning avatars requires nuance. Here are insider strategies.
Mastering Layering and Z-Fighting: Roblox renders clothing in a specific order. If two items occupy the same space (like a tight shirt and a jacket), they can "Z-fight," flickering as they compete. Solve this by using items designed to layer (check descriptions) or by using body parts that replace the base mesh entirely (e.g., a full-body suit as a Torso and LeftArm replacement).
The Power of Transparency: Some of the best fun avatar tips involve using transparent or partially transparent textures on clothing or body parts to create ethereal effects, holograms, or "energy" auras. Look for items with alpha channels.
Animation Syncing: Don't just play any animation; sync it to your avatar's theme. A sleek cyberpunk avatar with sharp movements pairs well with precise, mechanical animations. A fantasy mage might use flowing, graceful emotes. Experiment with :SetAnimationPriority to make your custom animation override the default walk cycle.
Community Knowledge is Key: The R63 community guide is a living resource. Follow talented avatar creators on platforms like Twitter or YouTube. They often share new asset IDs for exclusive UGC items and demonstrate novel command combinations. The statistic of 256k views on a popular tutorial shows there's a massive, hungry audience for this knowledge—tap into that community.
Common Pitfalls and How to Avoid Them
Even with the best catalog avatar tips, beginners hit snags.
- "Asset ID not found": You copied the wrong ID, or the item is a "model" (a collection of parts) instead of a single "MeshPart" or "Clothing." You need the ID of the individual wearable asset.
- Avatar looks broken/missing parts: You likely forgot to set a required body part. The R63 rig is interconnected. If you replace the
Torsobut not theLeftArm, the arm might detach. Always ensure you have a complete set of limbs. - Items not showing up: Check your R63 setting again. Some commands only work with R63 enabled. Also, ensure you're not trying to equip an R6-only item onto an R63 character.
- Commands not working in some games: The Catalog Avatar Creator interface is a separate game. You must be in a game that has this specific GUI enabled. You cannot use these commands in the main Roblox frontpage or just any random experience.
Conclusion: Your Avatar, Your Canvas
Mastering how to make R63 in catalog avatar creator is about shifting your mindset from a consumer to a creator. The tools are there, buried in plain sight, waiting for you to type the first command. You now understand that R63 is your high-fidelity canvas, and the Catalog Avatar Creator is your direct line to every brushstroke, texture, and motion.
This ultimate beginner's guide has equipped you with the vocabulary, the command syntax, and the workflow to stop wondering and start building. The journey from asking "Ready to create your dream avatar?" to actually seeing that avatar run, jump, and emote in a Roblox world is now entirely in your hands. The 256k views on existing tutorials prove the demand for this skill. Now, you have the power to be one of the creators fueling that trend.
Start small. Replace one body part. Add one custom animation. Save your configuration. Gradually build complexity. The R63 community thrives on innovation and sharing. As you learn, share your discoveries. The information is no longer gatekept. It's yours. Now, go open that command box and type your first :SetBodyPart. Your dream avatar awaits.